Sending data from Power BI to Flow
Power BI is a powerful business intelligence tool that allows users to create visually appealing and informative reports and dashboards. Power Automate, also known as Microsoft Flow, is a cloud-based service that allows users to create workflows to automate various tasks. By combining Power BI and Power Automate, users can create automated workflows to update their Power BI dashboards and reports with the latest data.
This document will guide you through the process of using a Power BI flow to upload to Flow datasets.
Access assumesto thatPower youAutomate havepremium connectors is required. At time of writing, Microsoft offers a basic90 understandingday offree Powertrial. BIPlease andsee PowerMicrosoft's Automate.documentation for more information.
To begin, download the Power Automate package zip file (TODO link). The package contains the necessary components to create the flow in Power Automate.
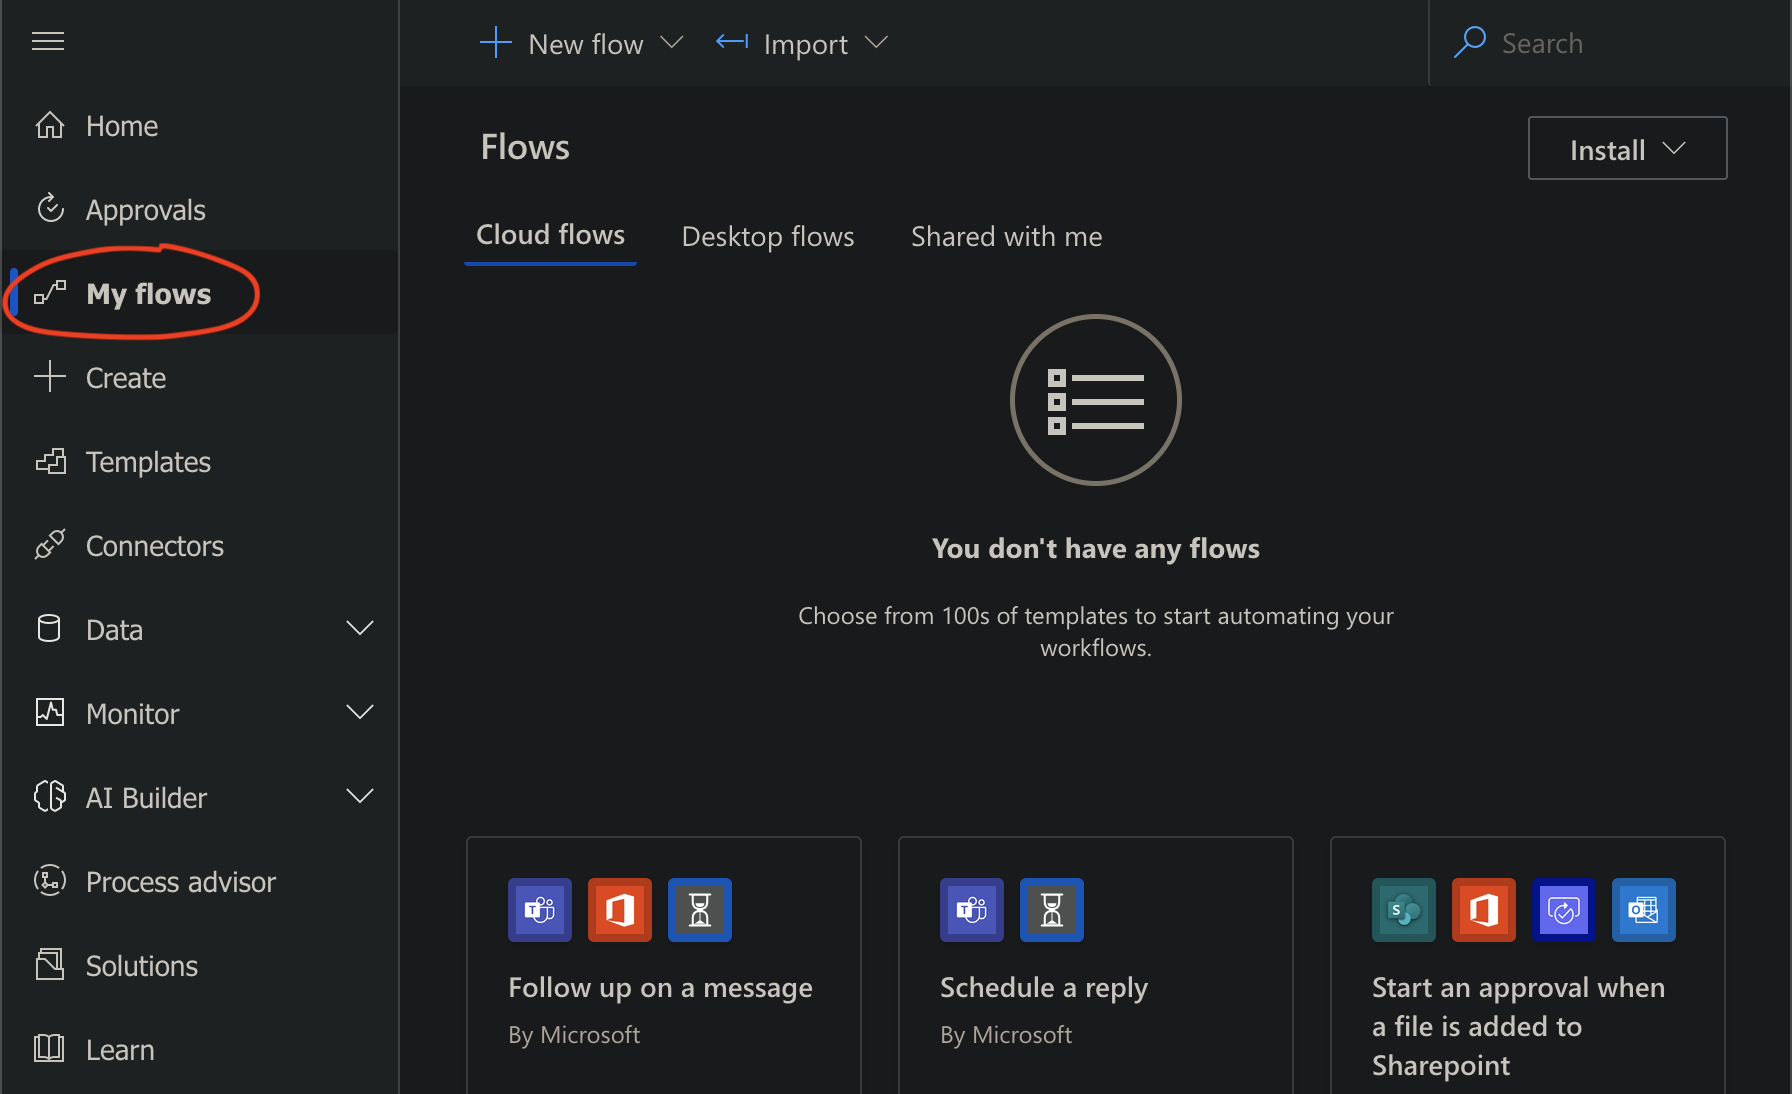
1. Go to the "My Flows" tab inon the Power Automate.Automate website.
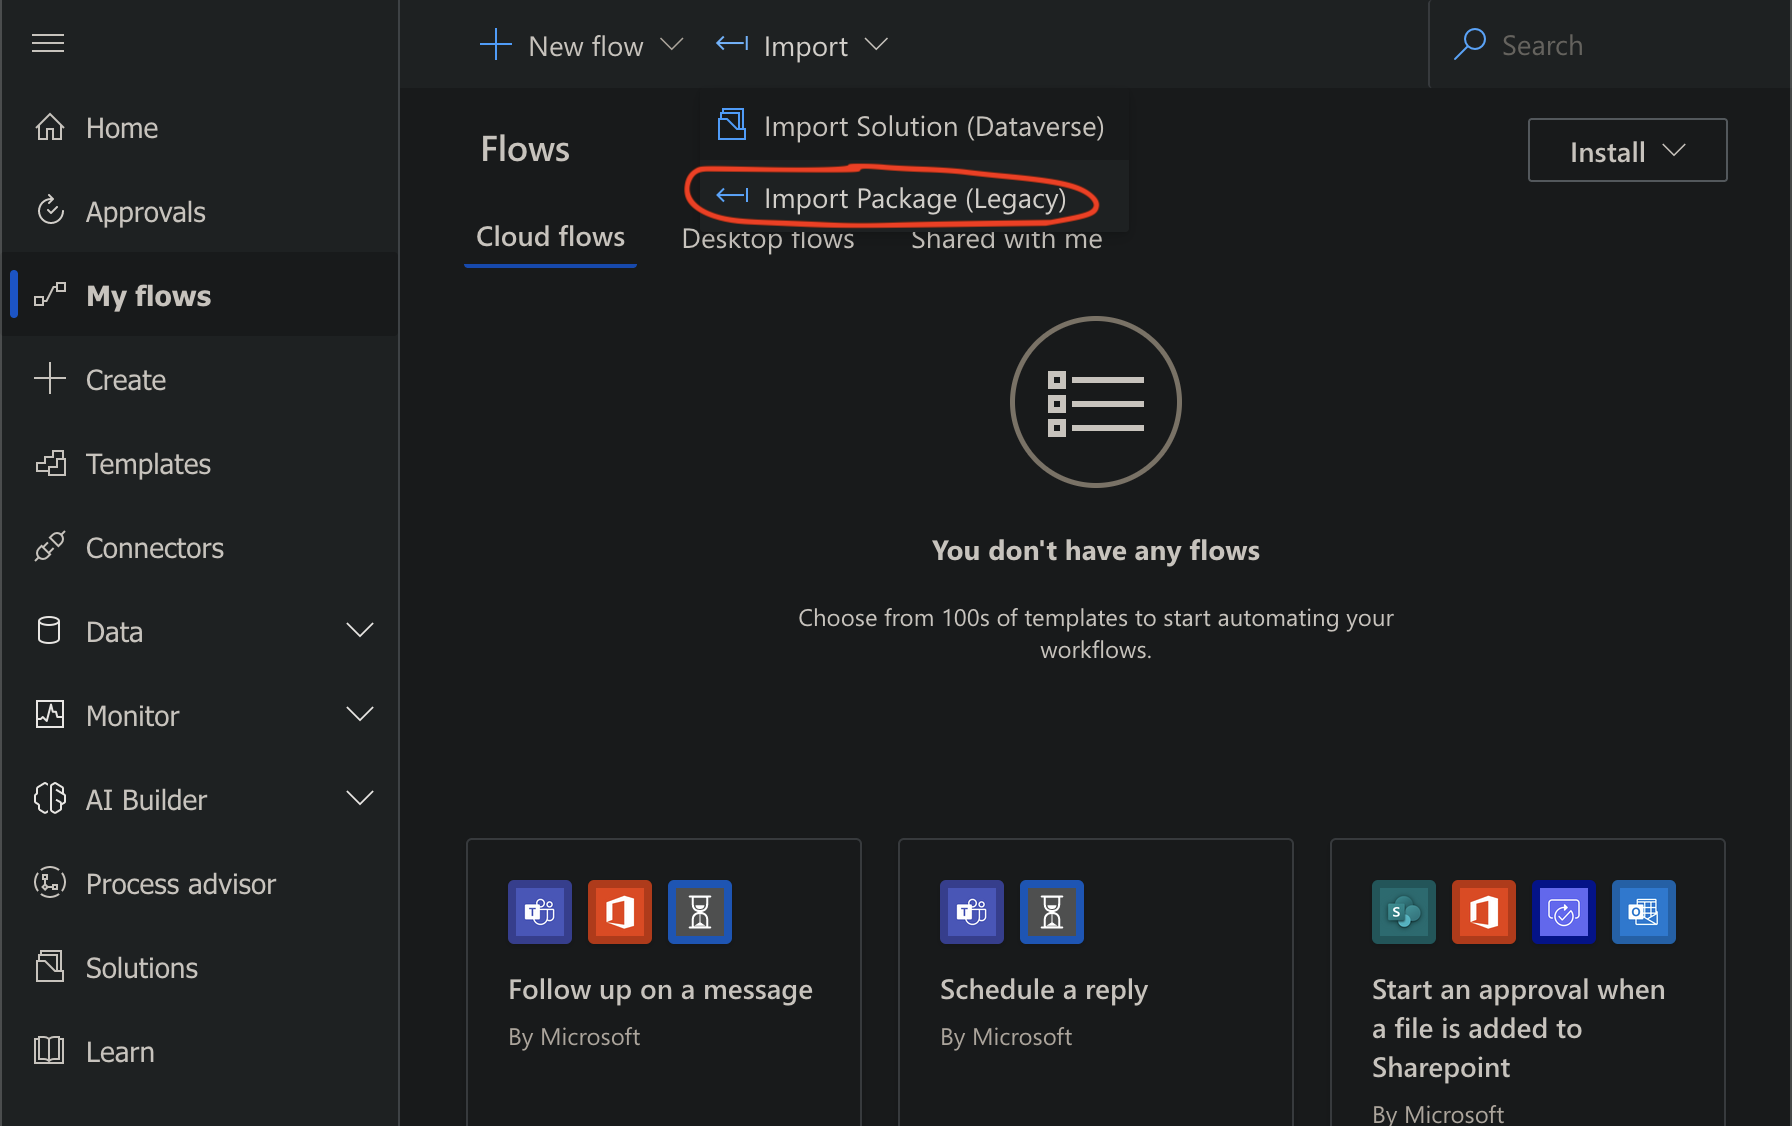
2. Click on "Import" and then select "Import package (Legacy)" from the dropdown menu.
3. In the "Import package" dialog box, click the "upload" button and select the downloaded zip file.
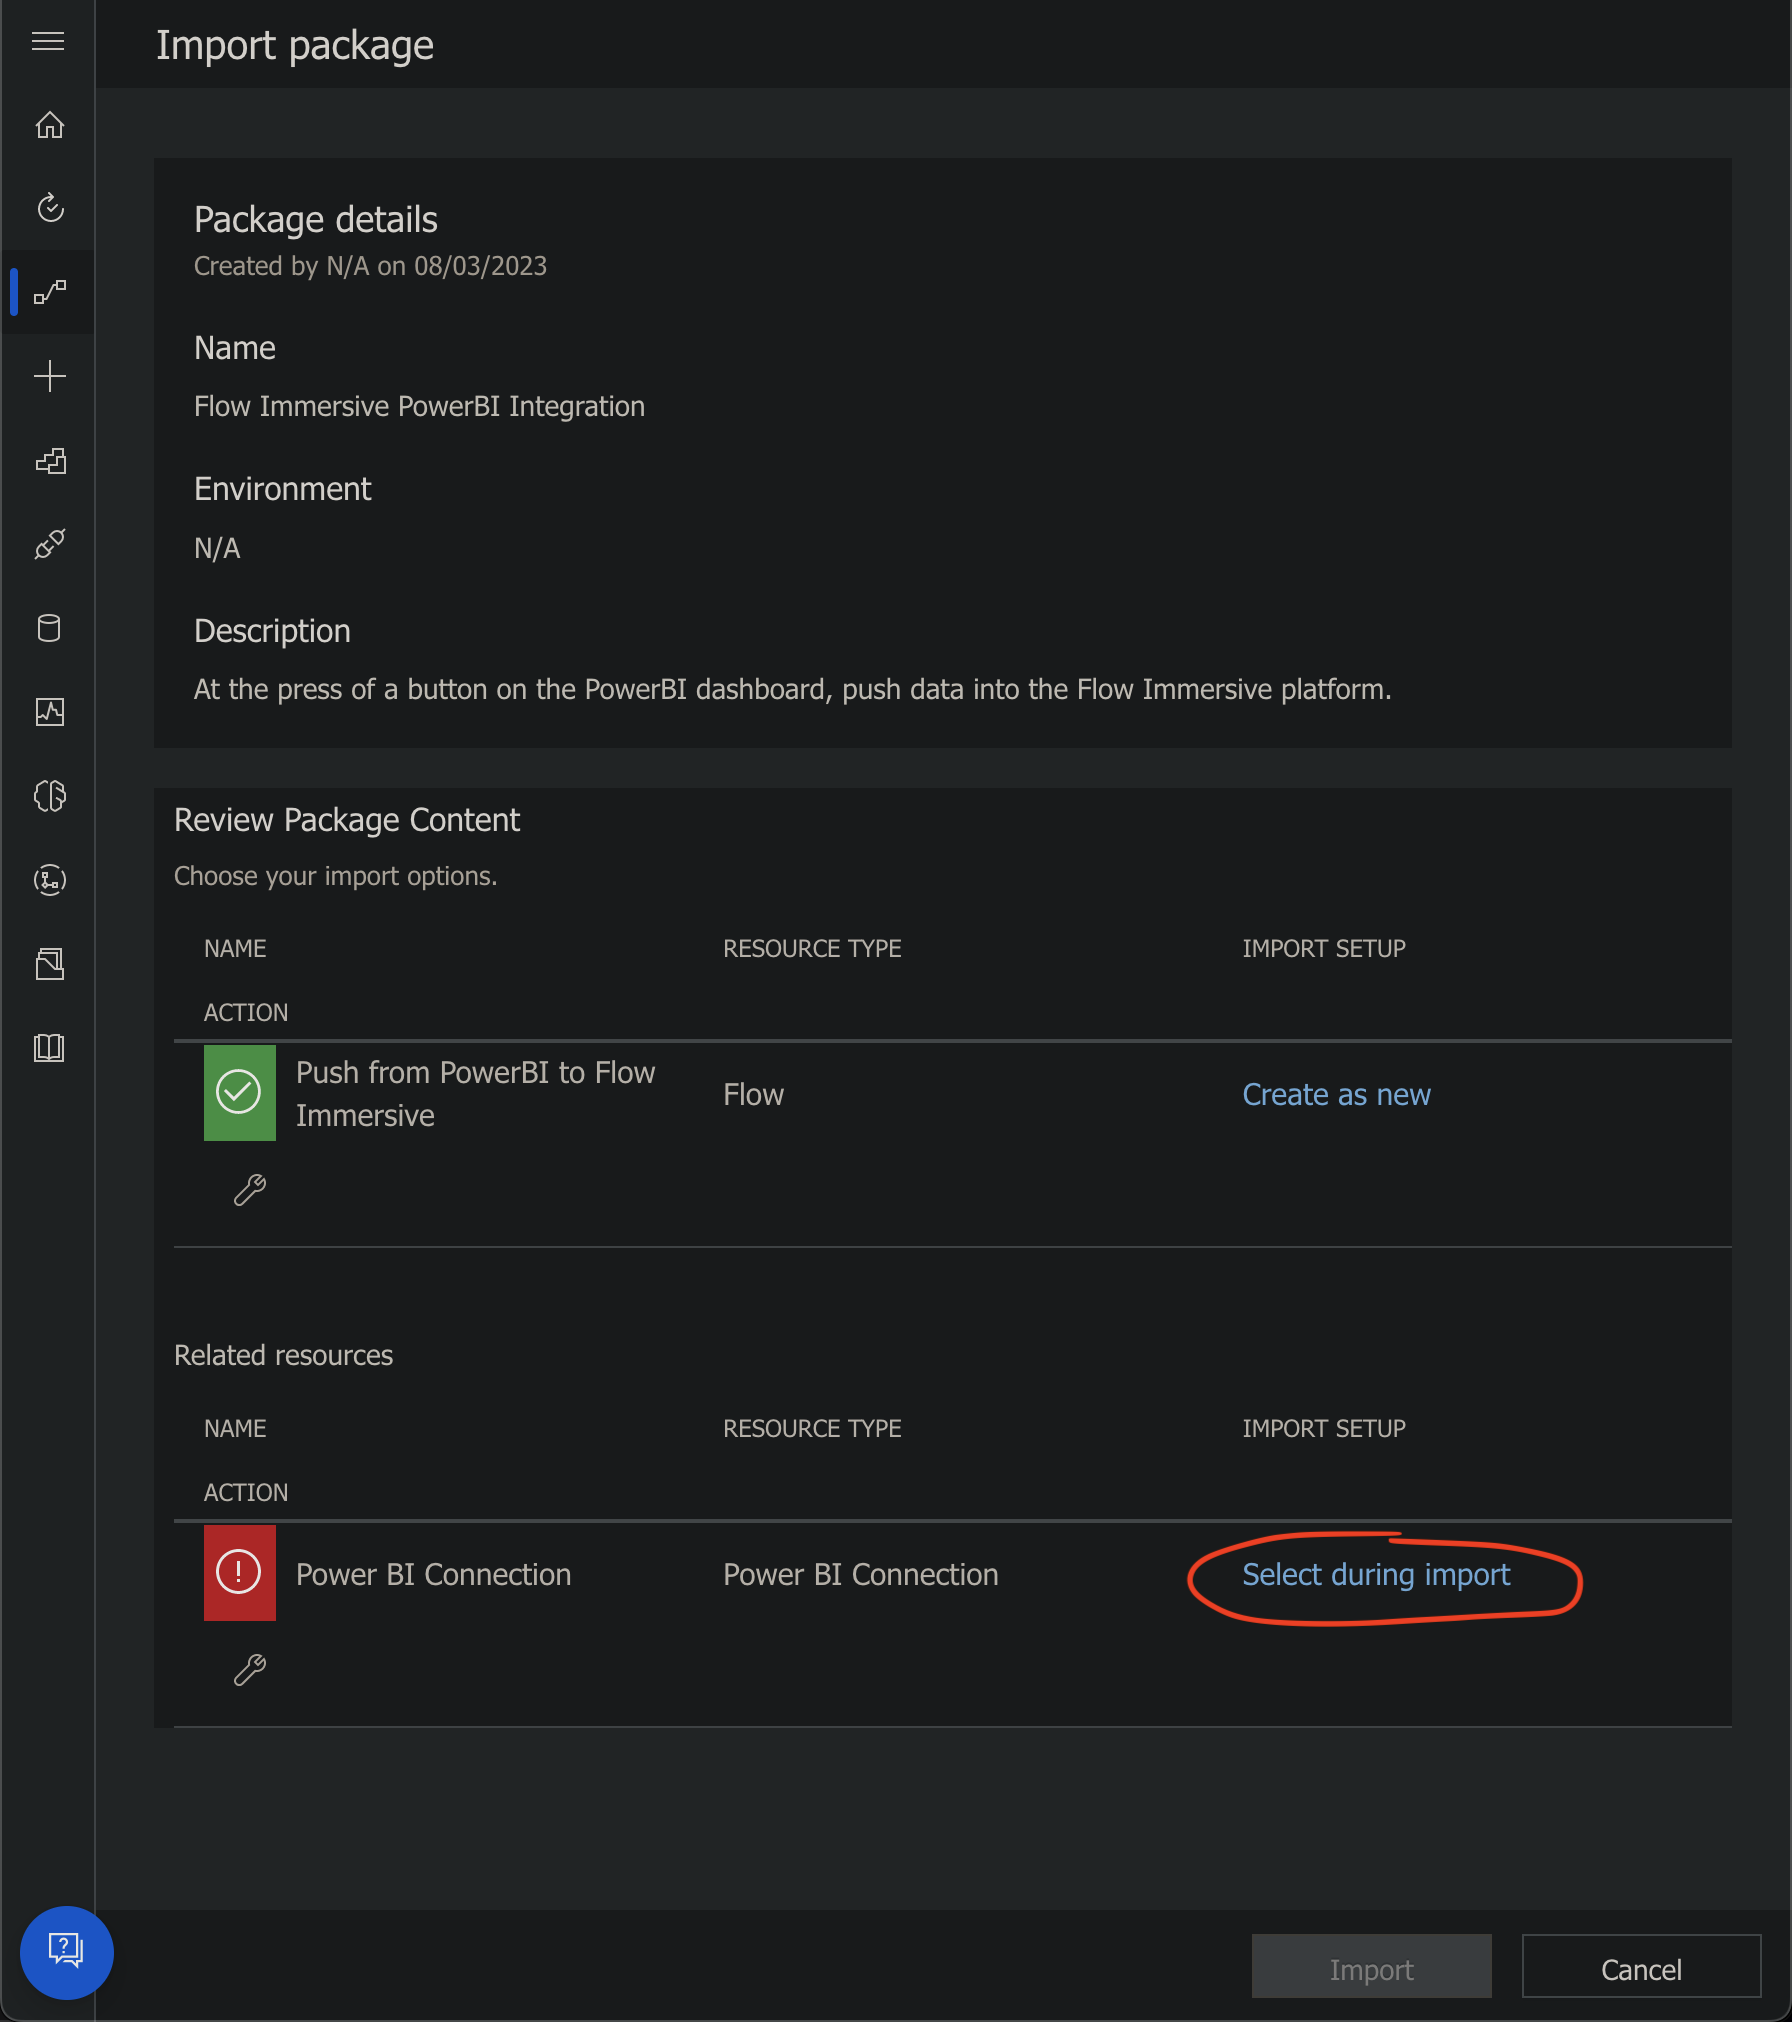
4. Once the zip file has been uploaded, click "Select during import" under "Power BI Connection" in the "Related resources" section,section.
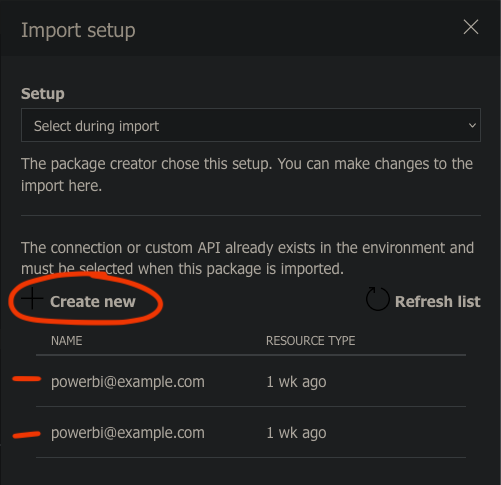
5a. Choose one of your existing Power BI connections, or press "Create new" if you don't have any yet.
5b. (if you don't yet have a Power BI connection) Press "New connection".
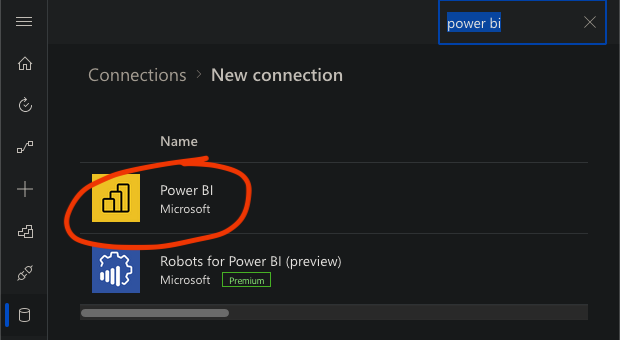
5c. (if you don't yet have a Power BI connection) Find and select Power BI from the list, and press "Create", and follow through the instructionslogin flow. Afterwards, return to createthe orprevious page and select ayour power BI connection toas Powershown BI.in Afterstep selecting5a.
connection, click "Import" to complete the import process.
5.5d (if you didn't have a Power BI connection) return to the menu and select
6. Once the import is successful, click "Open flow" to configure the flow.
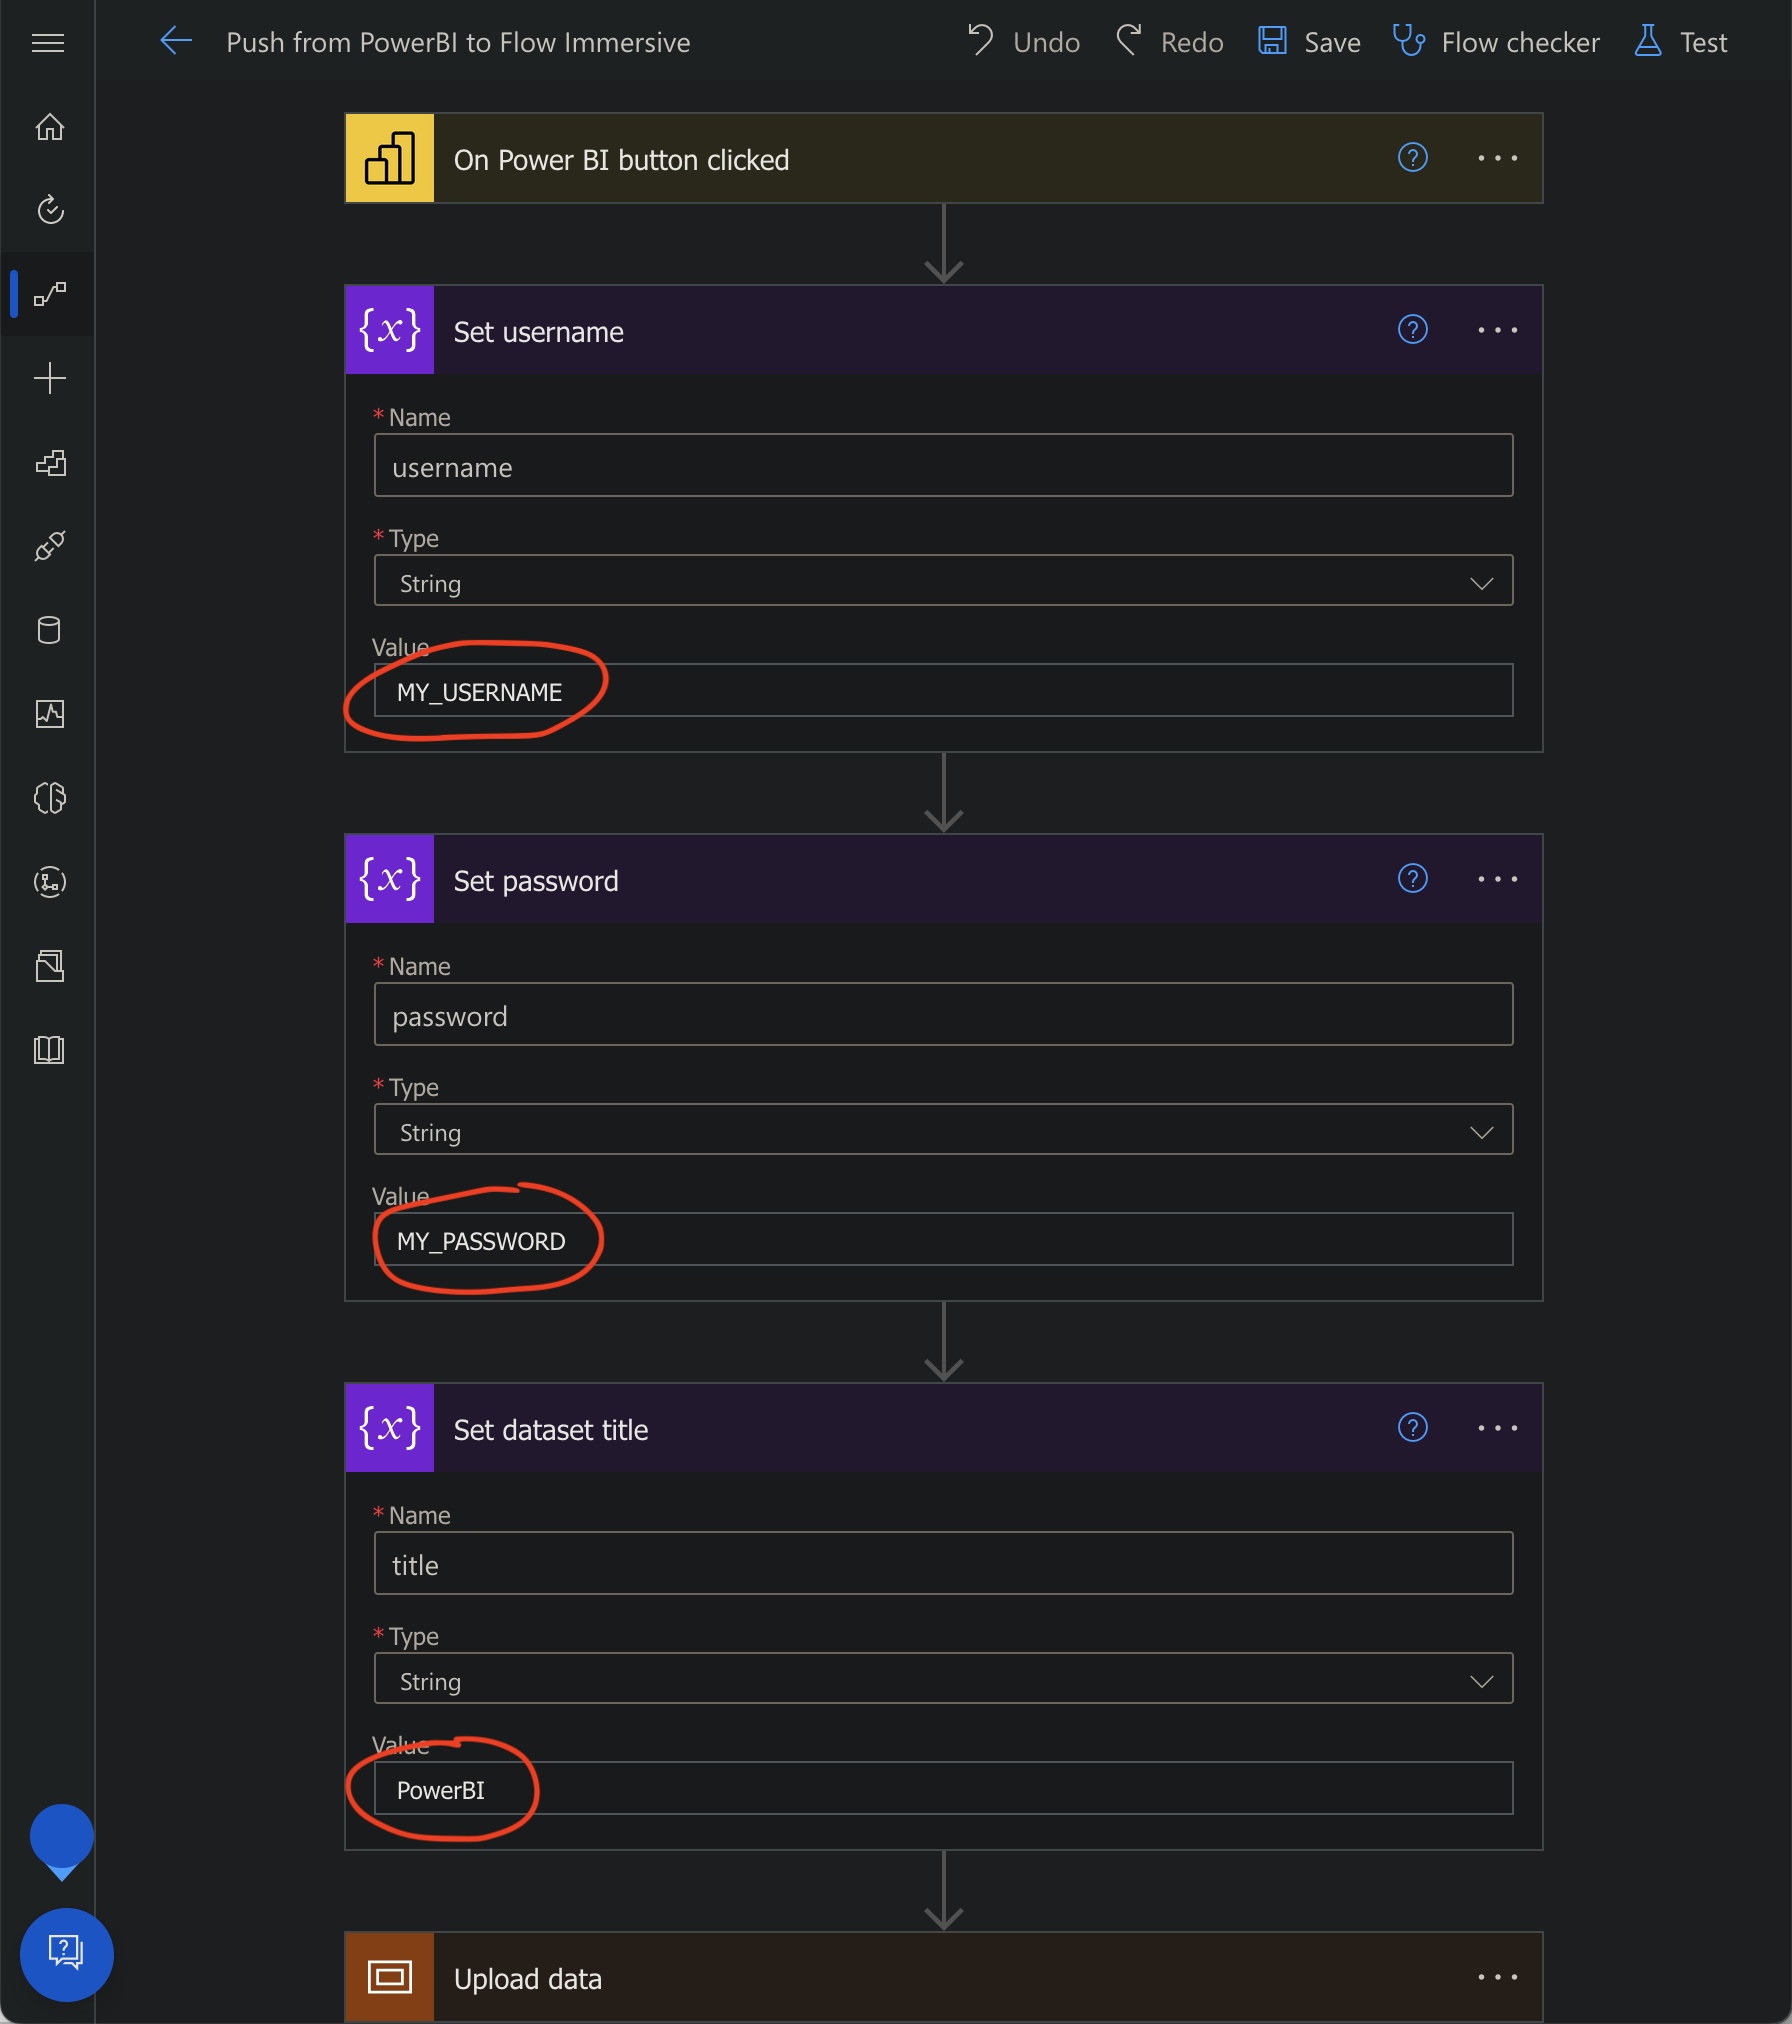
Now that you have imported the Power Automate package, you must configure it with your Flow Immersive credentials and the title of the dataset you wish to upload:
1. In the flow configuration screen, expand the "Set username," "Set password," and "Set dataset title" steps.
2. Enter your credentials and the name of the dataset you want to upload.
3. After entering your credentials and dataset title, click "Save" to save your changes.
4. Click "Back" to return to the previous screen.
5. Click "Turn on" to start the flow.
Now you're free to apply it to a Power Automate component in your Power BI dashboard:
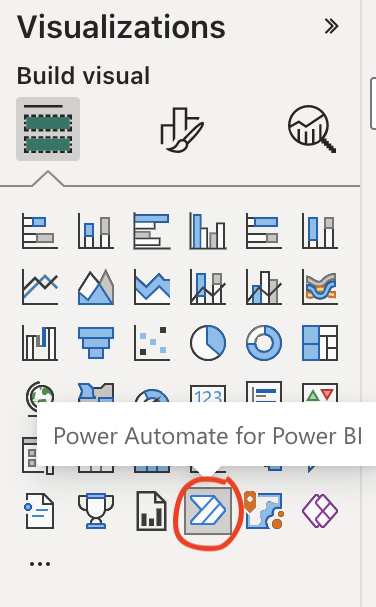
1. From the toolbox, select "Power Automate for Power BI."
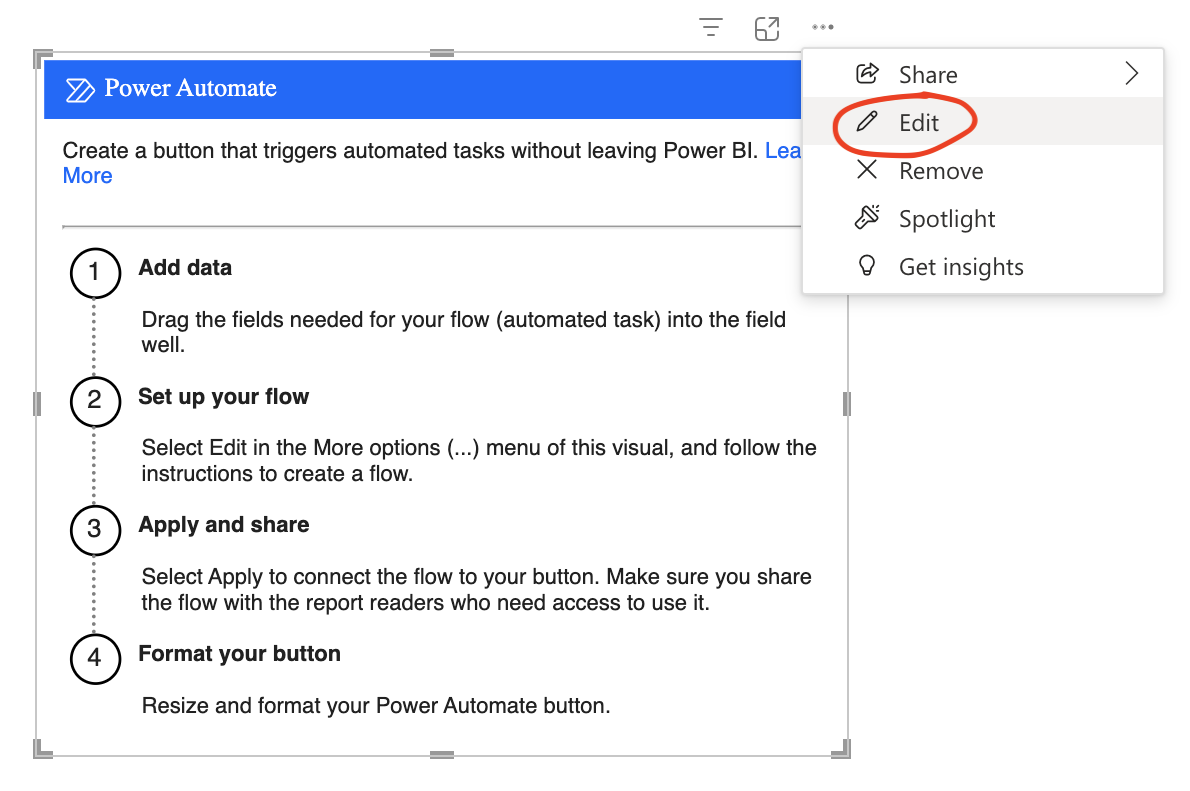
2. Select the "Edit" in the More options (...) menu of the component.
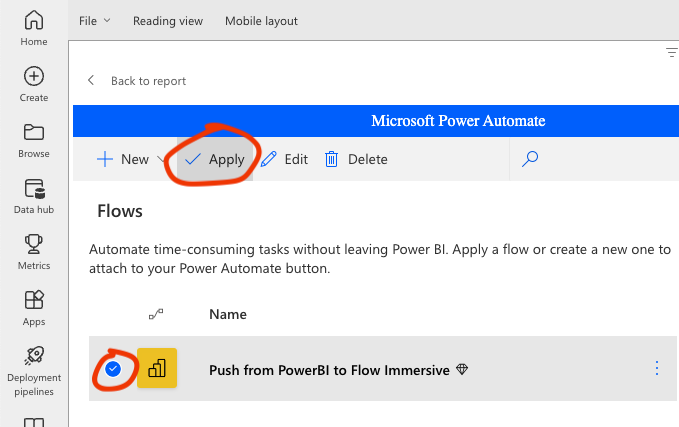
3. Choose the "Push from Power BI to Flow Immersive" flow you've created.
4. Select "Apply".
Congratulations, you've successfully added a Power BI button that sends data to Flow. Try attaching some data to it, triggeringclicking it,it while holding CTRL, then checking the datasets menu.


